Drying flowers is all the rage in recent years as a long-lasting way to display flowers all over your home. It’s also a fantastic way to preserve special memories like wedding bouquets or anniversary gifts.
Luckily, the floral experts at Bouqs are here to help you learn how to dry flowers! There are various methods that all lend their own strengths. Drying flowers is for anyone and everyone, including people who don’t love crafts. Think of this as a science experiment! Once you have dried flowers you’re proud of, all that’s left is to decide how you’d like to enjoy them. We’ve got some ideas for that too.
How to Preserve Flowers
First, decide on the method you’ll use to dry your flowers. The type of flower and your end goal will influence your choice as each mode works best for different projects. These methods work well with typically the best garden flowers.
Air Drying Flowers

Air drying is the simplest method to retain the shape of your flowers. It’s perfect for larger flowers or those with many layers of petals, like roses, carnations, lavender, and strawflower. Drying flowers will inevitably shrink the original petals, which is why we recommend larger blooms for this method.
Flowers to Use: Roses, sunflowers, yarrow, carnations, lavender, and strawflower.
Materials Needed: String
Steps:
- Remove excess leaves from the stems, leaving a few if desired.
- Wrap the ends of the stems with string. You can bundle multiple stems together, but ensure they aren’t crowded.
- Hang the flowers upside down in a dark, dry environment.
- Let them dry for about two weeks. If they’re still damp, give them more time.
- Violà! Carefully remove the flowers and use them in your chosen project.
Helpful Tips & Tricks:
- Use a fan to improve air circulation if needed.
- Expect blooms to fade as they dry. For brighter colors, try the microwave method instead.
- Leaves tend to become crispy and don’t dry well, so it’s best to gently remove them from the stem below the bloom before drying.
Microwaving Flowers

Microwaving flowers might sound unusual, but it quickly removes moisture while preserving color. According to Science Direct, the microwaves penetrate the flower’s moist material, converting into heat that turns the moisture into vapor.
Flowers to Use: Buttercups, pansies, dahlias, peonies, daffodils, and zinnias.
Materials Needed: Large, microwave-safe bowl, and silica sand.
Steps:
- Cut the stems to fit in the bowl and remove extra leaves.
- Put an inch of silica sand in the bowl, place the flower on top, and cover it with more sand.
- Microwave the flower, checking every 30 seconds until dry.
- Leave the flowers in the sand for at least 12 hours to ensure they are completely dry.
Helpful Tips & Tricks:
- Small flowers like pansies take 1-2 minutes, while larger flowers like roses take 3-4 minutes.
- Silica sand can be found in hardware stores.
- If they still feel moist after time in the microwave, put them back in under a heavy dish for 30-second increments until dry.
Pressing Flowers

Pressing flowers creates flat, versatile flowers ideal for displays. It’s also arguably the most accessible method for preserving flowers.
Flowers to Use: Cosmos, Queen Anne’s lace, goldenrod, poppies, buttercups, and marigolds.
Materials Needed: Heavy books, and thick, unbleached paper.
Steps:
- Arrange your flowers on a sheet of unbleached paper and place another sheet on top.
- Insert the flowers between the pages of a book, then close the book and stack weights on top.
- Let the flowers dry for a week, checking them occasionally.
Helpful Tips & Tricks:
- For large flowers, press individual petals.
- Partially dried flowers are easier to arrange.
Making an Herbarium Press

If you’re serious about preserving flowers, consider making an herbarium press. They are used for (real-deal) botanists to dry and flatten plant specimens for studying flora year after year. Pressed collections made from a Herbarium Press are essential for “studies in taxonomy, systematics, ecology, anatomy, morphology, conservation biology, biodiversity, ethnobotany, and paleobiology, as well as being used for teaching and by the public.”
Materials Needed:
- Wooden frames or cardboard (two pieces, usually 12×18 inches)
- Corrugated cardboard (cut to the same size as the wooden frames)
- Blotting paper or newspaper (cut to size)
- Straps or ropes (to secure the press)
- Pressing sheets (optional, such as thin cardboard or cardstock)
- Foam sheets or felt pads (optional, for added pressure distribution)
Steps
Preparation
- Prepare the frames by cutting two sturdy pieces of wood or thick cardboard to the desired size, typically 12×18 inches.
- Cut several pieces of corrugated cardboard to the same size.These will be used to provide ventilation and even pressure distribution.
- Cut sheets of blotting paper or newspaper to the same size as the frames. These will absorb moisture from the plant specimens.
Assembling the Press
- Place one wooden frame or piece of thick cardboard on a flat surface.
- Place a sheet of corrugated cardboard on top of the frame.
- Place a sheet of blotting paper or newspaper on top of the corrugated cardboard.
- Arrange the plant specimen on the blotting paper. Ensure the leaves and flowers are spread out flat and are not overlapping.
- Cover the specimen with another sheet of blotting paper or newspaper.
- Place another piece of corrugated cardboard on top.
- Repeat the layering process (blotting paper, specimen, blotting paper, corrugated cardboard) until all specimens are placed.
Top Frame:
- Place the second wooden frame or piece of thick cardboard on top of the stack.
- Use straps, ropes, or heavy-duty rubber bands to tightly secure the stack. Make sure the pressure is evenly distributed across the entire press.
Drying Process:
- Place the press in a warm, dry area. You may need to change the blotting paper or newspaper every few days to ensure thorough drying and prevent mold growth.
- Check the specimens periodically and replace any damp blotting paper or newspaper. Continue this process until the specimens are completely dry, which may take several weeks depending on the humidity and thickness of the plant material.
Ideas for Dried Flowers
Now that you know how to dry flowers and your favorite blooms are frozen in time, let’s find the perfect way to display their beauty.
Pressed Flower Cards

Works best with: pressed flowers
Who doesn’t love receiving a card in the mail, let alone one with personally pressed flowers? It adds a natural, elegant touch to an otherwise plain card. Ideal for any occasion, from birthdays to weddings or simply to brighten someone’s day, pressed flower cards convey thoughtfulness and care. In addition to being effortlessly beautiful, making a pressed flower card is a fun and relaxing craft that can help you exercise your creative side.
Materials Needed: Dried flowers, blank card, paintbrush, and glue.
Steps:
- Arrange flowers on the card and apply glue to the bottom of each flower with a paintbrush.
- Place flowers on the card and let it dry.
Dried Flower Bouquets

Works best with: air-dried flowers
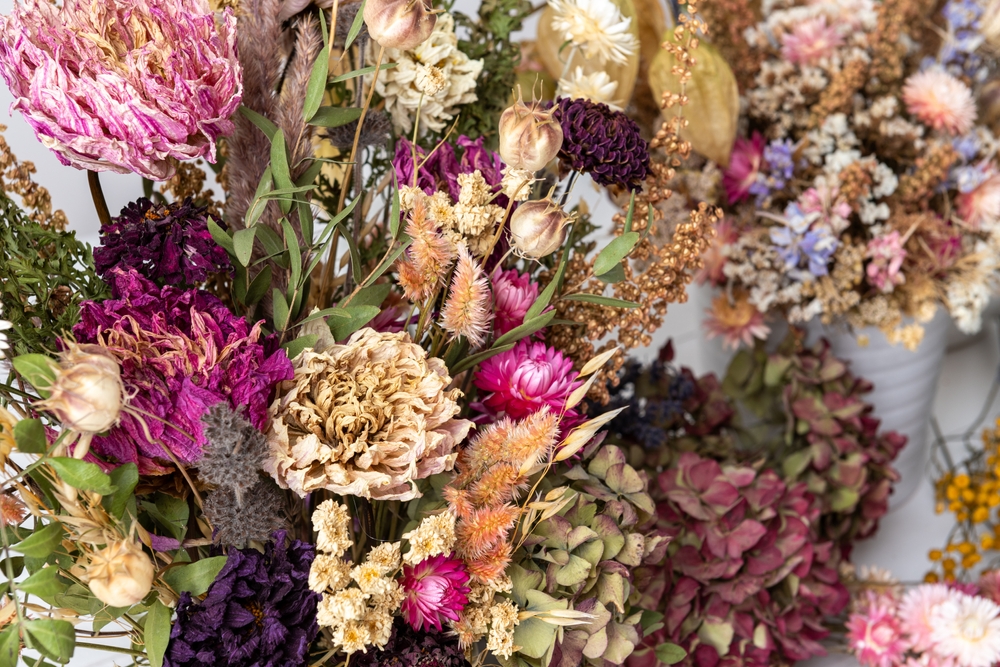
Creating dried flower bouquets is a delightful and sustainable way to enjoy the beauty of flowers year-round. Unlike fresh flowers, dried bouquets retain their charm and vibrancy for months, requiring minimal maintenance and care. Create bouquets or wreaths with muted colors and romantic tones that fit right into any season’s decor. Simply arrange the already dried flowers, utilizing longer stalks like lavender to create length, and tie off around the stem. You can display your creation gingerly in a vase or as a stand-alone wall piece.
Flower Confetti

Work best with: air-dried flowers, pressed flowers, microwaved flowers
This under-utilized wedding custom showers newlyweds leaving their ceremony with beautifully dried flower petals, wishing them love, good luck, and general well wishes. Mix dried flowers for eco-friendly confetti perfect for celebrations beyond just weddings.
Gift Toppers

Works best with: air-dried flowers, pressed flowers, microwaved flowers
Using dried flowers as a gift topper adds a touch of elegance and thoughtfulness to your presents—and all you need is twine and scissors! It’s a simple yet sophisticated way to make your gifts stand out, showing that you put extra effort into making the recipient’s experience special. Plus, the dried flowers can be kept as a keepsake.
Flower Salt or Sugar Scrubs

Works best with: air-dried flowers, pressed flowers, microwaved flowers
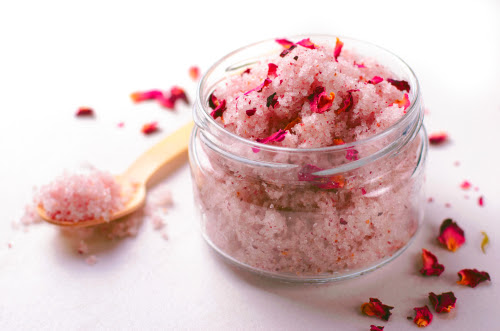
Grab newly dried roses to create a luxurious, fragrant bath time ritual. Start by combining sugar with a carrier oil such as coconut oil or almond oil, to your finely chopped dried flower petals. Feel free to add extra essential oils to your liking. Stir until the sugar looks like wet sand, then store in a dark, cool place for a couple weeks.
Dried Flower Pendants

Works best with: pressed flowers, small microwaved or air dried flowers
These delicate creations capture the essence of flowers, allowing their vibrant colors and intricate details to be showcased in a unique piece of jewelry. This not only protects the flowers from damage but also gives the jewelry a glossy, elegant finish. Dried flower pendants make for meaningful, personalized gifts and can serve as cherished mementos, encapsulating memories of special occasions, gardens, or loved ones.
Materials Needed: Epoxy resin, pendant molds, gloves, tweezers, glue
Steps:
- Mix resin and pour a small amount into the pendant mold.
- Arrange dried flowers on the resin, secure with glue, and let it dry.
- Add another layer of resin and let it dry.
Make Dried Flowers From Fresh Ones
The real first step to learning how to preserve flowers starts with fresh flowers. Learn how to start a garden and never have a shortage of blooms to use in creative projects. If you want to skip the drying process, you can always order dried flowers and start crafting right away. Whether you dry flowers yourself or order dried flowers online, enjoy your dried flowers in any space for any occasion.
Shop All


